
Painting Takeoff: Wall, Ceiling and Façade Areas from the PDF Drawing
Take wall, ceiling, façade and plaster areas off the PDF drawing, marked on the plan and delivered as an Excel takeoff. With a worked example and the measurement rules in brief.

A painting takeoff starts with one question: how large are the wall, ceiling, façade and plaster areas? Taking them off a drawing by hand means working room by room, and at the end you still have to show where every figure comes from. PlanReader takes this groundwork off your hands: you upload the PDF drawing and get the areas marked on the plan and the takeoff as an Excel list.
Test one plan for free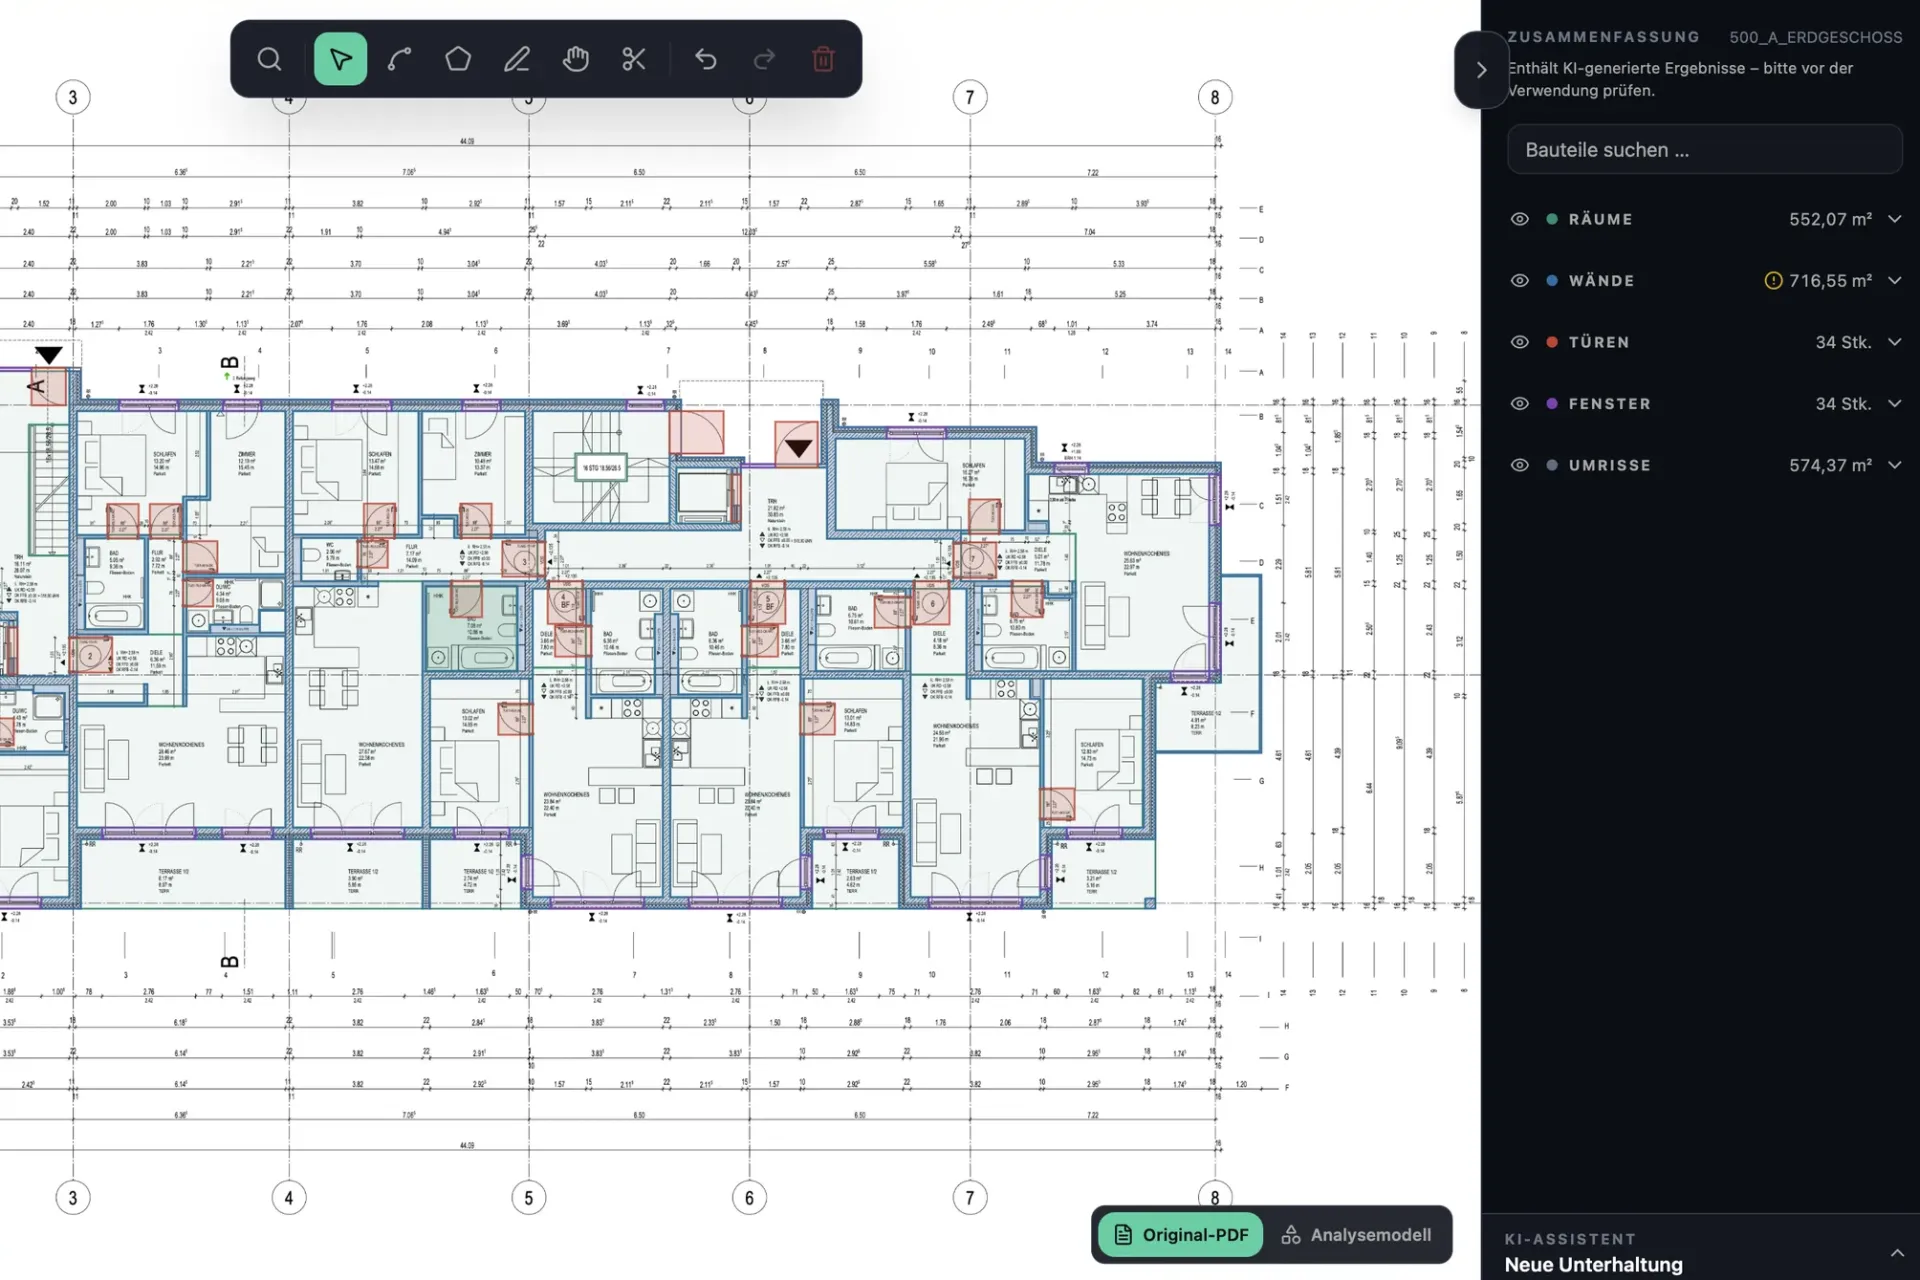
Wall area for painting: a worked example
The wall area of a room is its perimeter times its height, minus the openings your measurement rules deduct. An example: a room measures 4.00 m × 5.00 m and is 2.60 m high. The perimeter is 18.00 m, so the gross wall area is 18.00 m × 2.60 m = 46.80 m².
- Door 0.90 m × 2.10 m = 1.89 m²
- Window 0.90 m × 1.00 m = 0.90 m²
- Patio door 2.00 m × 2.10 m = 4.20 m²
- Wall area, all openings deducted: 46.80 m² − 6.99 m² = 39.81 m²
- Ceiling area: 4.00 m × 5.00 m = 20.00 m²
- Reveals, by length: window 2 × 1.00 m + 0.90 m = 2.90 m, patio door 2 × 2.10 m + 2.00 m = 6.20 m
The openings come to 15% of the gross wall area, so the rule for deducting them decides the quantity. One room is quick to calculate; a storey with 40 rooms is not. That is where PlanReader comes in.
Which areas PlanReader takes off the drawing
You upload the PDF drawing and say in your own words what you need. PlanReader captures the areas that matter for painting and plastering:
- Wall areas: per room, from the wall lengths on the floor plan and the room height you set for the plan.
- Ceiling areas: per room, straight from the floor plan.
- Façade areas: from the elevations, for coatings and external render.
- Plaster and render areas: inside and outside, as a category of their own next to the coating areas.
- Windows and doors: counted and marked on the plan, so you can deduct openings the way your bill of quantities requires.
Whether you need a single category, one trade or the whole plan is up to you.
Every area marked on the plan
PlanReader draws every area it captures straight onto your original PDF. You see at a glance which wall, which ceiling and which part of the façade goes into the quantity and where something is missing. Whatever you see differently, you change directly on the plan: adjust, add or delete an area. The Excel export picks up every change.
The takeoff as an Excel list
What you get is not just a total but a takeoff you can check: the Excel list shows the areas per room and category, for one plan or for all plans in the project. Walls, doors and windows come with their IFC class.
Because every quantity is drawn on the plan, it can be traced. That helps when you check your quantities against the bill of quantities for your bid, and when you invoice and the client wants to know where a figure comes from.
How painting is measured: the rules in brief
Measurement rules differ from country to country, and the bill of quantities or the contract says which ones apply. In the UK, the RICS New Rules of Measurement (NRM 2) cover painting in work section 29 “Decoration” and plaster and render in work section 28:
- Painting, net: the area measured is the area covered, so every opening is deducted.
- Narrow and small surfaces: work up to 300 mm girth is measured by length, isolated areas up to 1 m² are counted.
- Kept separate: internal and external work, and ceilings more than 3.50 m above the floor.
- Plaster and render: measured net as well, but openings up to 1 m² are not deducted.
In the example above, that gives 39.81 m² of wall to paint and 40.71 m² to plaster, because the 0.90 m² window stays in the plaster area. Australia and New Zealand use a standard method of their own, the ANZSMM, and many bills of quantities set their own rules. This is why PlanReader delivers the openings as well, and you decide under your contract how they go into the quantity.
How it works
- 1. Upload the drawing: upload a PDF floor plan or elevation and set the scale on the plan.
- 2. Describe the job: for example “wall and ceiling areas per room, windows and doors” or “external render areas”.
- 3. Check on the plan: every area is drawn on. Your team checks, adds and corrects.
- 4. Take over the Excel: the takeoff goes straight into your estimate.
PlanReader does the groundwork; checking and approval stay with your team.
Frequently asked questions
How is the wall area for painting measured?
Room perimeter times room height, minus the openings your measurement rules deduct. Under NRM 2, painting is measured net: the area actually covered. Work up to 300 mm girth is measured by length.
Are windows and doors deducted from the painting area?
That depends on the measurement rules in your contract. NRM 2 measures the area covered, so openings are deducted; other rules leave small openings in. PlanReader lists every window and door individually, so you can apply either.
How is the façade area measured?
From the elevations: length times height for each section of the façade, minus the openings. PlanReader takes the façade areas off the elevations and marks each section on the plan.
Can PlanReader list plaster areas separately?
Yes. Interior and exterior plaster areas are a category of their own next to the coating areas, drawn on the plan and listed in the Excel file.
Which drawings do I need?
PDF drawings: floor plans for wall and ceiling areas, elevations for façades. You set the scale on the plan.
Quantity takeoff by trade
More articles in this series:
- Drywall: partition areas for one side or both
- Screed, tiles and flooring: room areas and floor build-up
- MEP, electrical and HVAC: counting fixtures, measuring runs
- Concrete and masonry: walls by material
- Façade: insulation, render and cladding areas from the elevations
- Road and civil works: paved areas, channels, sewers and manholes
All features at a glance: quantity takeoff from PDF drawings with PlanReader.